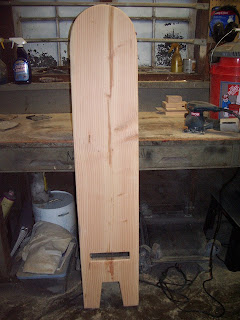
I case you were wondering what I was doing while I was not posting, here it is.
I was busy working on this shot glass case.
I will post some more photos of it soon.
Wednesday, April 13, 2011
Monday, April 11, 2011
Viking Style Chair
Sorry for the delay in posting. Been busy in the wood shop and been neglecting my computer. My current project is viking style chairs for use while my crew and I are out camping. My roommate and I worked on this most of the day.
The Viking style chair uses two pieces of 2x12 to make the seat and the back. The seat slots into the back, creating a nice reclined chair for relaxing around the campfire and watching the stars.
After using the scroll saw to cut the rounded seat we found out that slower is better, otherwise you end up bending the blade during the turn and have to sand like crazy to get the edge back into shape.
We then cut in behind the seat to make the long tongue that will slot into the back. Using a chalk line we tapered the tongue and then cut it with a circular saw.
The back has legs cut into it and then a slot for the seat to go into. The legs add extra stability that helps the seat on uneven ground.
Here it is assembled. After we get to doing the more intricate design stuff, like maybe adding a celtic knot to it on the seat or back and then staining, I will post more on this project.
Subscribe to:
Comments (Atom)


